Mein Panzer Cold War - The S2’s Demonstration

Introduction

Back in the day when I was a young lieutenant of infantry in Germany, the battalion S2 (the staff intelligence officer) set up a demonstration for the battalion’s officers. Summoned to the Battalion HQ we were presented with a sand table and an array of blue and red counters from the SPI game “Firefight” (this was a board game commissioned by the US Army to help teach its people about modern war) deployed in the sand. The topic was how a US mechanized infantry company (the blue force) could defend itself using its TOWs and Dragon ATGMs against the attack of a Soviet motor rifle regiment (the red force) mounted in BMPs. Neither force had any support, neither artillery or close air.
The S2 proceeded to explain his purpose and then advanced the rigidly arrayed Soviets towards the carefully deployed US force. The Soviet counters quickly disappeared from their formation as they moved forward, each a victim of a TOW or Dragon. The Soviets force was rapidly defeated and the US force suffered scarcely at all. This was very gratifying to the assembled officer group and I recall no questions concerning the validity of the demonstration. I considered privately that it would indeed be a wonderful thing if our enemy would be be so obliging as to carry on as demonstrated by the S2, but I suspected that reality would probably be somewhat different.
Since OGDW has yet to publish its Cold War rules and data for the Mein Panzer system, but has, teasingly, published some data for US and Soviet forces (published on this site as Chapter 58) and as time for all of us is running out, I decided to use what OGDW has provided and try some Cold War scenarios using what was at hand. Thus this AAR which uses the S2’s demonstration as a test bed for the Mein Panzer system in a Cold War setting circa 1976.
Situation
The US force is a standard mech infantry company of the time, which has taken losses in its infantry forces (each infantry platoon has lost a squad in a previous engagement), but with its mortars and TOW section intact. Three Dragons remain, apportioned one to each platoon of infantry.
The Soviets are a standard full strength motor rifle company of 10 BMPs with infantry and with a 4 tank platoon of T-62s attached.
Neither side has any artillery or air assets in support, with the exception of the US mortars.
Both forces are rated as Regulars for troop quality.
The US company has taken up a hasty position on a hill and has had time to dig in, but no more. The two TOWs are deployed on the flanks and are in Overwatch. The Soviets will attack across a kilometer of of open ground from a wooded area.
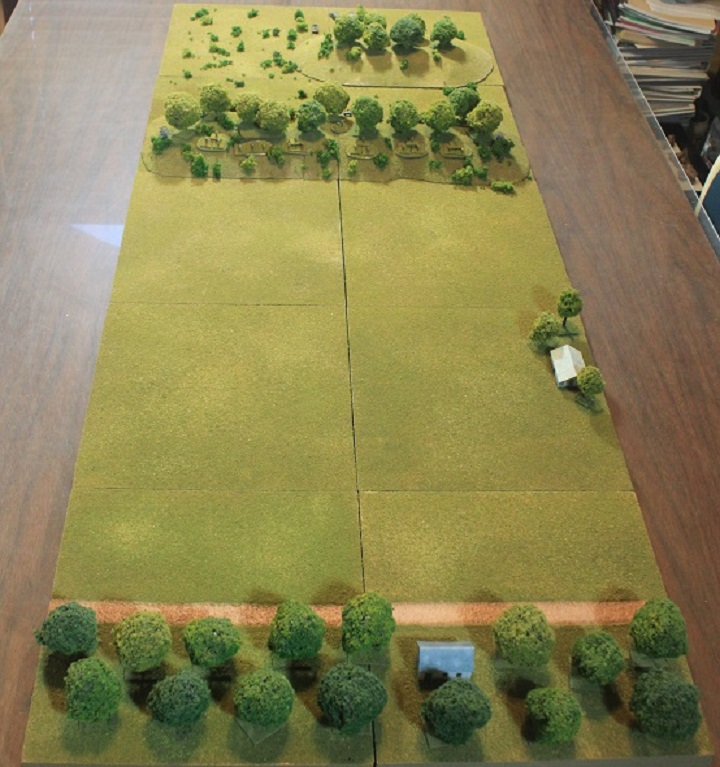
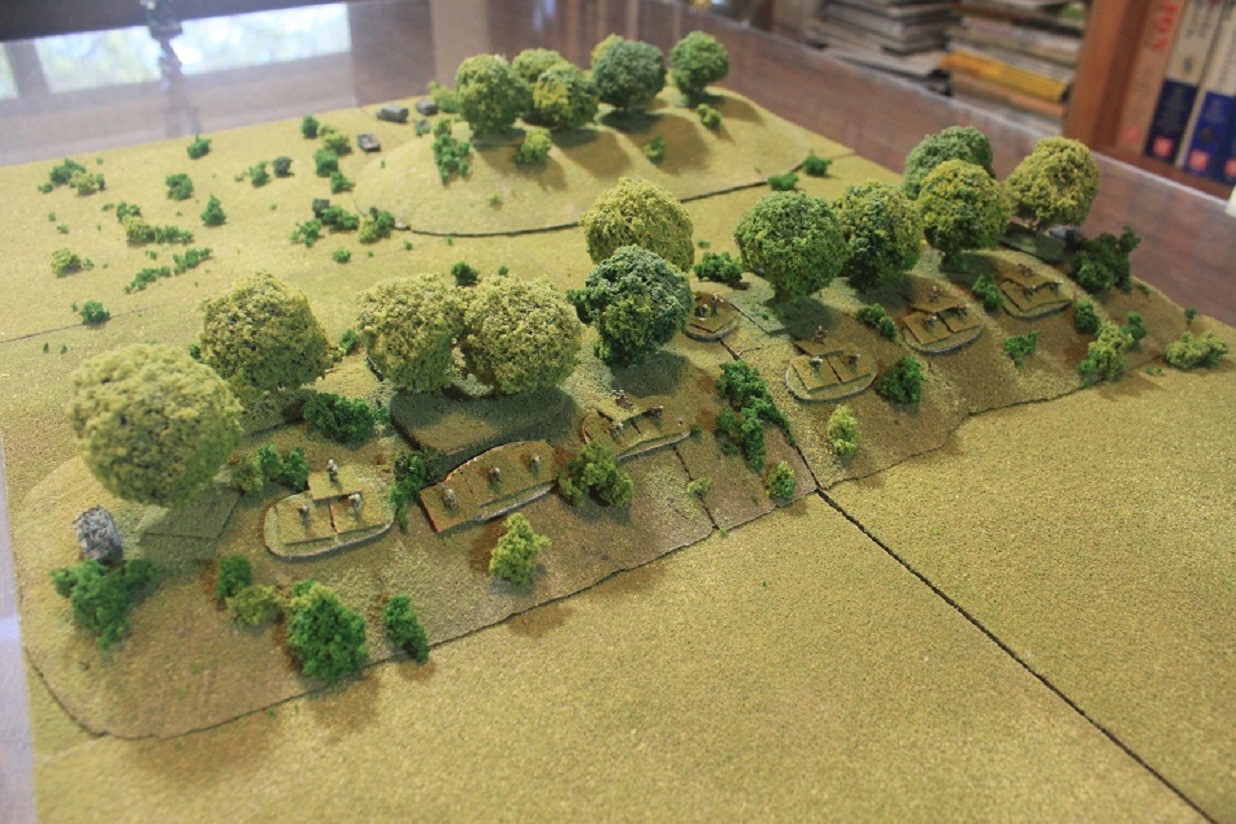
The view of the field from the Soviet side. The Soviets will attack out of the woods. They must cross a kilometer of open ground.
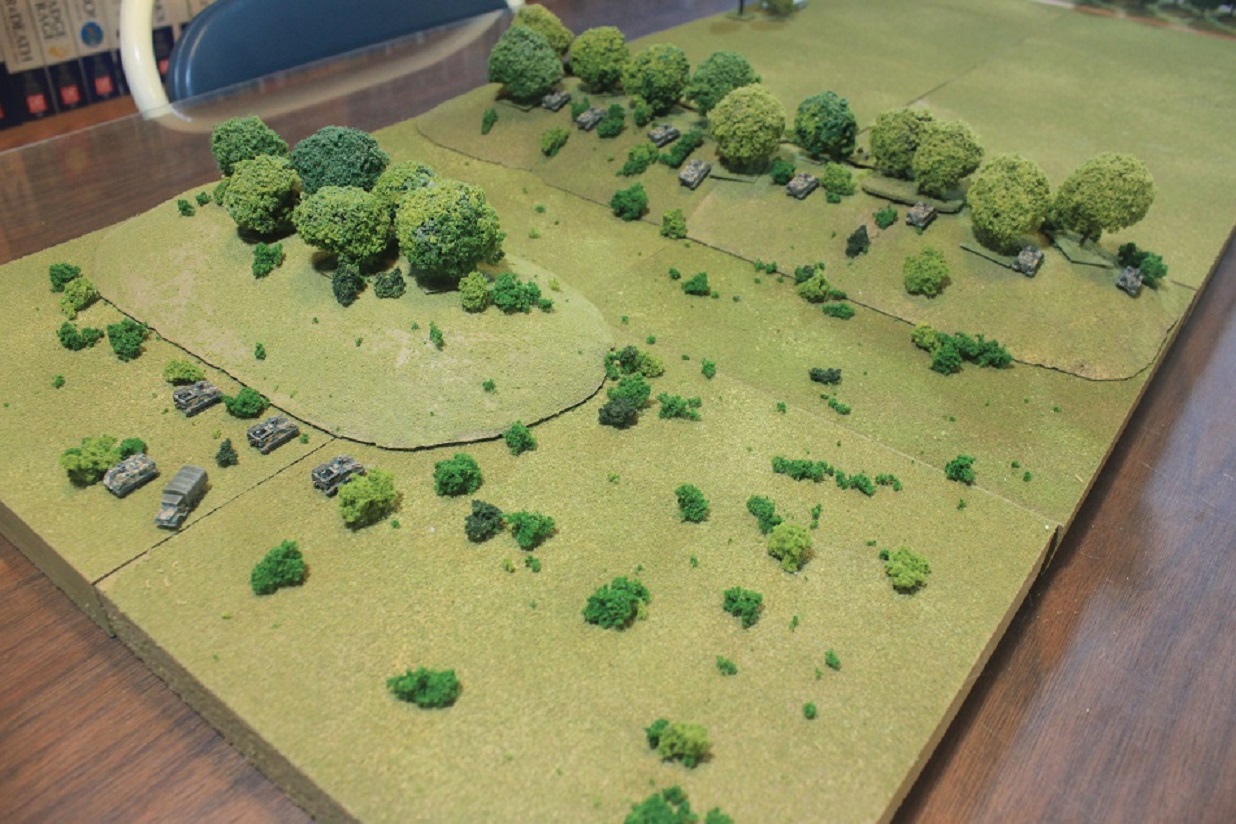
The US position from the Soviet perspective. TOWs are on either flank.
The rear of the US position showing the mortars.
The Engagement
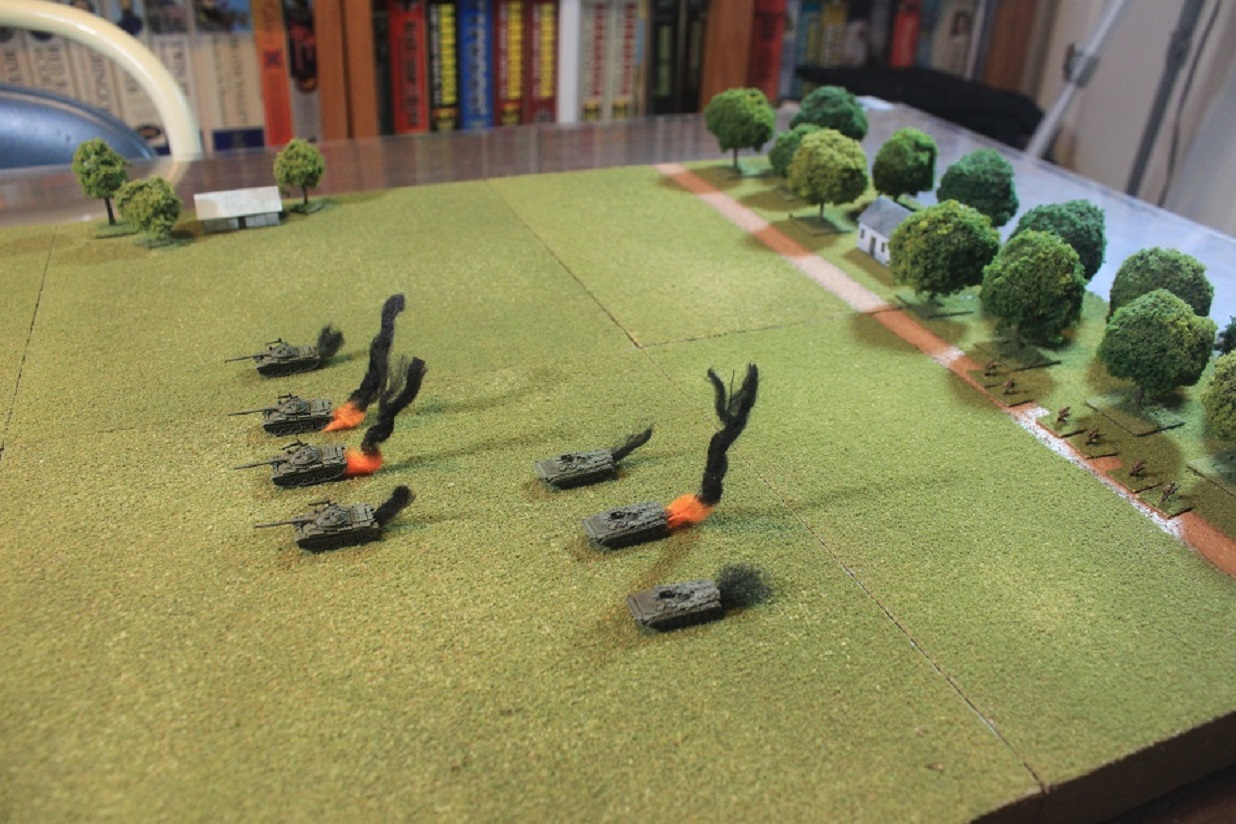
On Turn 1 the Soviets get the initiative and start their attack. The T-62’s lead, advancing at speed. The overwatching TOWs react: the first TOW misses because the target T-t2 spotted the incoming missile and reacted causing a miss; the second TOW kills its T-62. The TOWs are activated and get a second kill on a T-62. The BMP platoons follow their tanks and the US Dragons engage the tanks. The turn ends with the T-62 platoon destroyed.
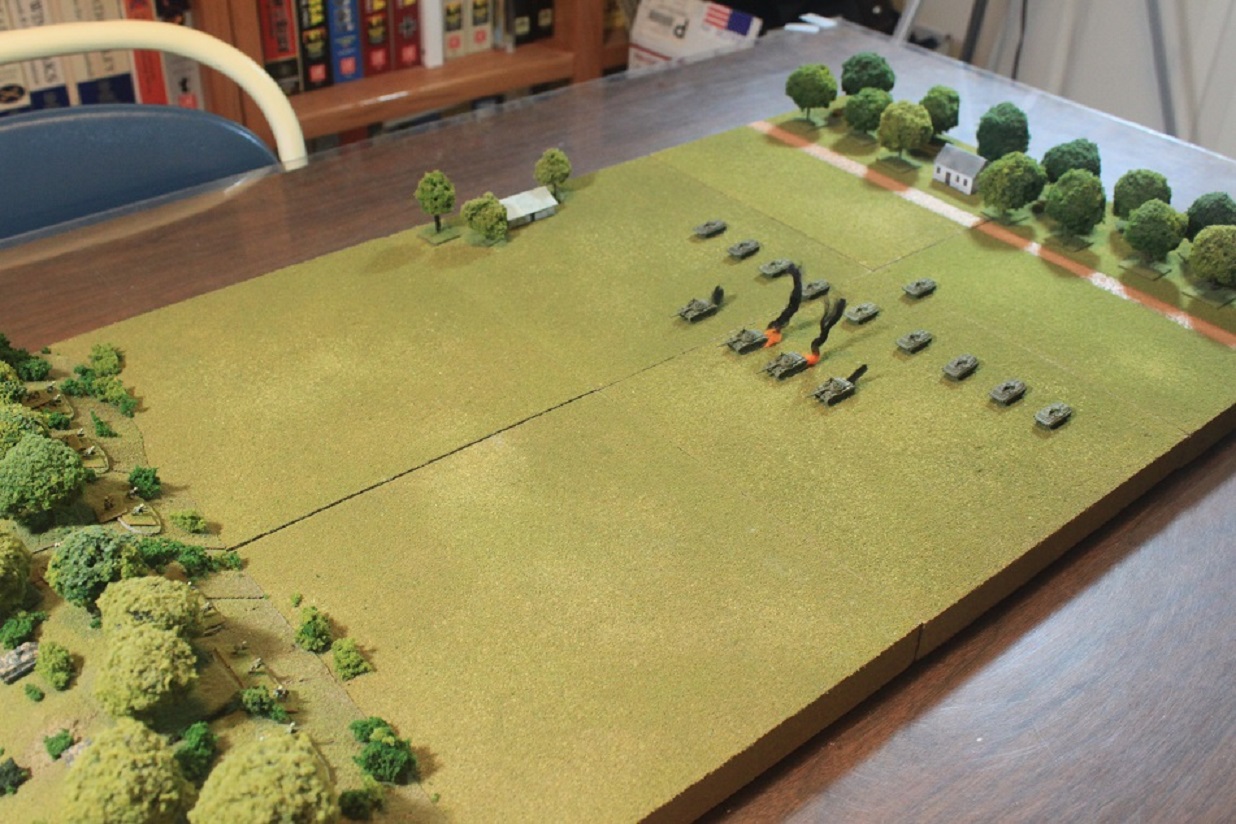
The end of Turn 1. The Soviet tanks are destroyed. The US has taken no casualties.
Turn 2 gives the initiative to the US. The TOWs fire and kill a BMP on the Soviet left. The BMP’s squad is able to escape from their vehicle. A Dragon kills another BMP on the Soviet left, its squad also escapes. The leftmost BMP platoon activates and fails its morale check and Breaks, turning tail and heading back to the woods. The center BMP platoon becomes Shaken and then takes a kill on a BMP from a Dragon. This platoon also turns about and heads to the woods. The right BMP platoon, seeing the attack falling apart joins in the retreat. In two short sharp turns the unsuppressed US ATGM defense destroys the Soviet attack.
The field at the end of Turn 2.
The S2 smiles, satisfied his demo has gone so well. LT Begemot keeps his counsel.
The US wins with no losses. The Soviets have lost 50% of their vehicles.
The Soviet counter demonstration of this scenario will follow soon.
Lessons
Notes
Mein Panzer works well for the Cold War period, unsurprisingly. Besides the increased lethality of weapons the greatest feature of the Cold War battlefield in its middle and late periods was ATGMs. This was the part of the system that I spent the most time with and here I found some issues.
How to understand the results of Missile Reaction was a bit of a puzzle in that the die roll results chart wasn’t clear. I finally decided that after applying all the listed modifiers to the troop quality level of the targeted vehicle and rolling the die that a Critical Success occurred if you rolled a 1; a Critical Failure occurred if you rolled a 20; a Success occurred if you rolled equal to or less than the modified TQ number. A Failure was any other roll. If this interpretation is wrong, please let me know.
ATGM range effects were an area that I modified. Using the current modifiers a TOW (OM1 = 2), fired by a Regular US gunner (TQ = 12), against a normally moving target (-1), target defensive modifier = 0, at range of 36” (-5) produces a To Hit probability of 20% (To Hit = 4). Pretty low. If the target is moving evasively then this To Hit probability goes to 0%. All the data I’ve seen relative to ATGMs is that their hit probability improves with increasing range as the gunner refines his aim. The Mein Panzer range modifiers assume the longer the range the less likely one is to hit. Reasonable for guns and rifles, but not so for ATGMs.
This is an anecdotal statement from a US Marine TOW gunner on his experience with the TOW that was posted on a game site that had just published a Cold War computer game. He thought that the game misrepresented the accuracy of the TOW:
“First of all, after working with the TOW missile system for 8 years in the USMC, it don’t make me a TOW missile expert, BUT ...
“We had issues with the regular TOW, then the ITOW, then finally the TOW 2 came out and we had big issues with the TOW 2. Shooting just the regular TOW missile 10 times, we would get a failure rate of approximately 3-4 missile failures. Most of those issues being a broken wire from the gun platform to the missile itself. We also had 2 missiles that blew up only 20-30 yards, which was an issue by itself because the TOW missile wasn’t supposed to arm its warhead until it went over 50 yards … When you fired your TOW missile after the missile leaves the launch tube the gunner is trying to acquire its target, then while that’s going on, the flight motors kick in and you can’t see ****!!!!! Around after 10-15 seconds now you can finally make sense out of everything, you can now see the target, see the IR light on the missile and now your heart is pumping hard now because in another 6-10 seconds, your target is getting ready to be obliterated, and they don’t even know it!!!!
“So if [you] can start making the TOWs less accurate at shorter ranges that would be a start, say from 50 yards to 1,000 yards the hit rate should only be around 60 to 65 percent, from 1,000 – 2,000 yards the hit accuracy will now be getting better so I would say 70-90 percent, then from 2,000- just over 3,000 yards my percentage would go from 80-95 percent.”
With this as a guide I created the following Range to Target modifiers for wire guided ATGMs using a Regular US TQ of 12 to work to the hit percentages indicated in the TOW gunners recollections:
- Up to 2” – not allowed (within arming range)
- Up to 6” - +0
- Up to 12” - +2
- Up to 24” - +3
- Up to 36” - +4
- Up to 48” - +5
- Up to 60” - +7
- Up to 72” - +9
Also, for wire guided ATGMs I disallowed the Evasive Movement modifier.
BMPs were not listed in the Chapter 58 tables so I used the PT-76 numbers for the BMP.
Hopefully, my efforts here will encourage and spur on the completion the Mein Panzer Cold War product.
Comments
Post a Comment