Mein Panzer Cold War - The Soviets' Demo

Introduction

My previously posted AAR, The S2’s Demonstration, showed how an unsuppressed ATGM defense by a depleted US mechanized infantry company using TOWs and Dragons could decisively defeat a Soviet attack by a full strength motor rifle company mounted in BMPs and supported by a platoon of 4 T62 tanks. Granted, this was an unrealistic scenario with the absence of artillery, but it did demonstrate how lethal an unsuppressed ATGM defense could be.
This AAR, The Soviet’s Demonstration, takes the same forces with the same mission, but now with both sides having artillery in support. In this scenario, the Russian God of War (Бог Войны) will speak.
Situation
It is the summer of 1976. The US force is a standard mechanized infantry company of the time, which has taken losses in its infantry forces (each infantry platoon has lost a squad in a previous engagement), but with its mortars and TOW section intact. Three Dragons remain, apportioned one to each platoon of infantry. The US force has a battery of 155mm artillery on call for Final Protective Fires (FPF).
Neither side has any air assets in support.
Both forces are rated as Regulars for troop quality.
The US company has taken up a hasty position on a hill and has had time to dig in, but no more. The two TOWs are deployed on the flanks and are in Overwatch. Their mission is to hold the hill they are positioned on.
The Soviets are a standard full strength motor rifle company of 10 BMPs with infantry with a 4 tank platoon of T-62s attached. The Soviets have a battalion (3 batteries of six guns) of 122mm artillery allocated to provide preparatory fires, 2 fires of HE and one fire of smoke.
The Soviets will attack across a kilometer of of open ground from a wooded area. Their mission is to seize the hill.
The Soviets will apply the concentrated fire of its artillery battalion on the US position to suppress the US defenses so that the attacking infantry and tanks can cross the open ground with minimal losses. This is in accord with Soviet practice: put a heavy barrage on a target in as short a time as possible to gain suppression and minimize the artillery’s exposure to counter-battery fire.
For example: the Soviets estimated that a battery of 6 guns would require 33 minutes to effect the destruction of a mech infantry company. Using a battalion of 18 guns would take 10 minutes.[1]
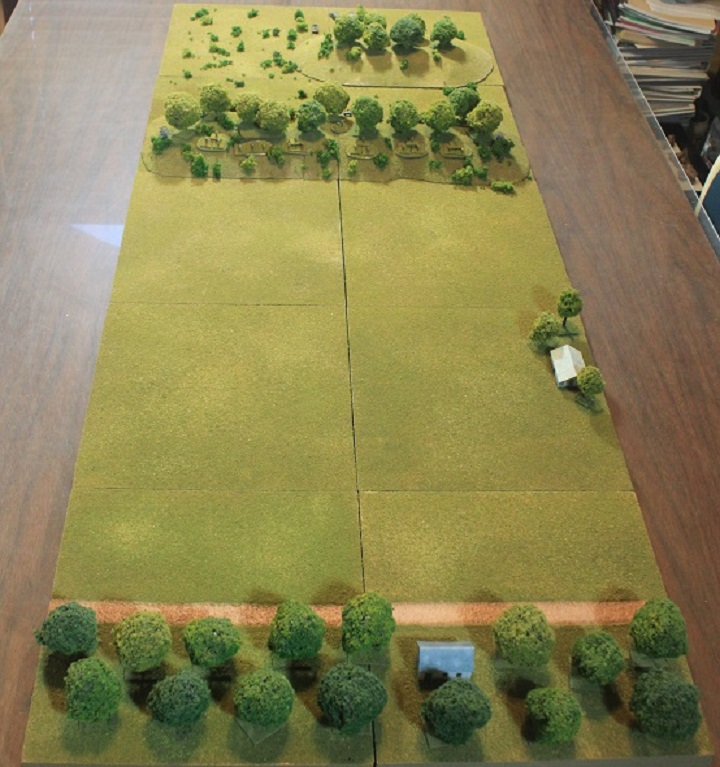
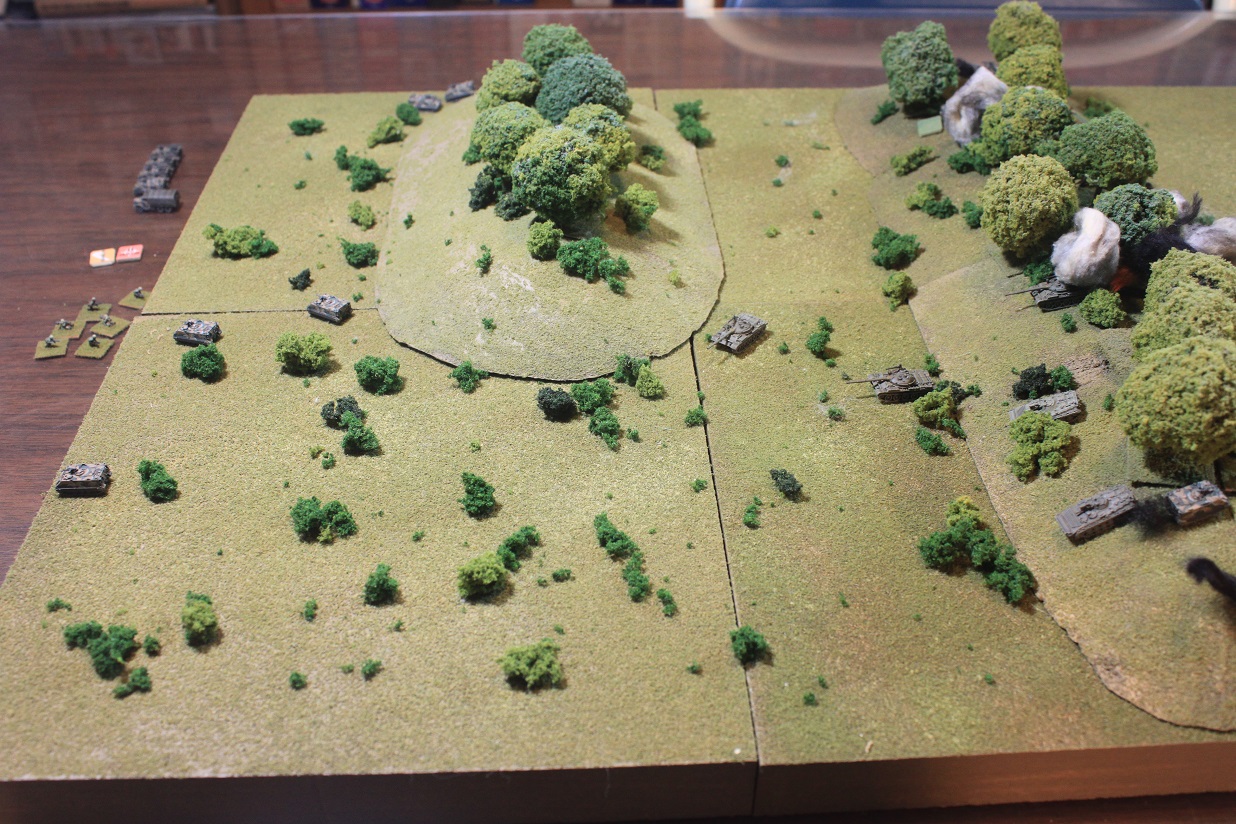
The view of the field from the Soviet side. The Soviets will attack out of the woods. They must cross a kilometer of open ground.
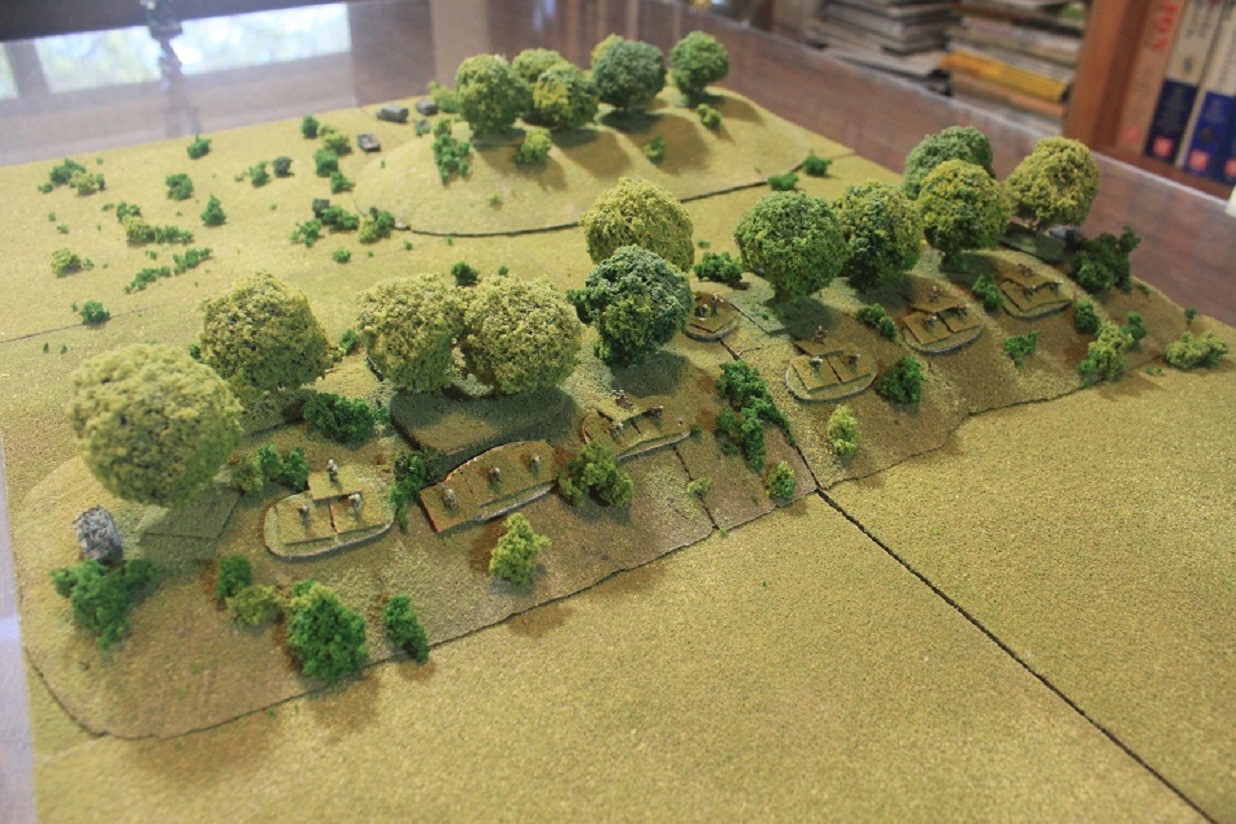
The US position from the Soviet perspective. TOWs are on either flank.
The rear of the US position showing the mortars,
The Engagement
Turn 1 sees the Soviet barrage begin of the US position. The effects are severe. Both TOW tracks are destroyed, an APC is destroyed and another is immobilized. One infantry squad takes a casualty and another is eliminated. This causes the left US platoon to Break, but they remain in place – nowhere to go except into the storm of fire. After seeing the effect of the barrage on their lost brothers the surviving APCs pull back down the hill to escape getting hit. All other US units in the beaten zone are pinned or suppressed. The Soviet attack force remains concealed in the trees.
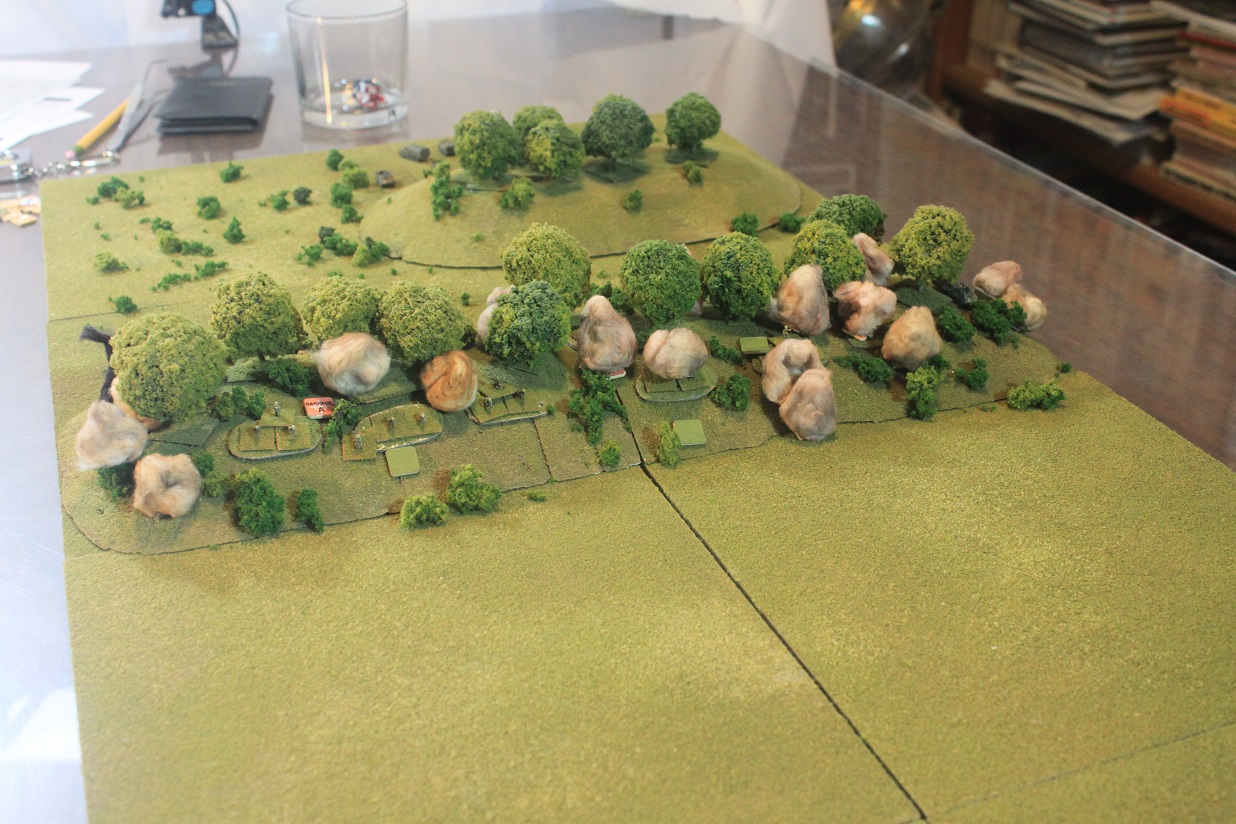
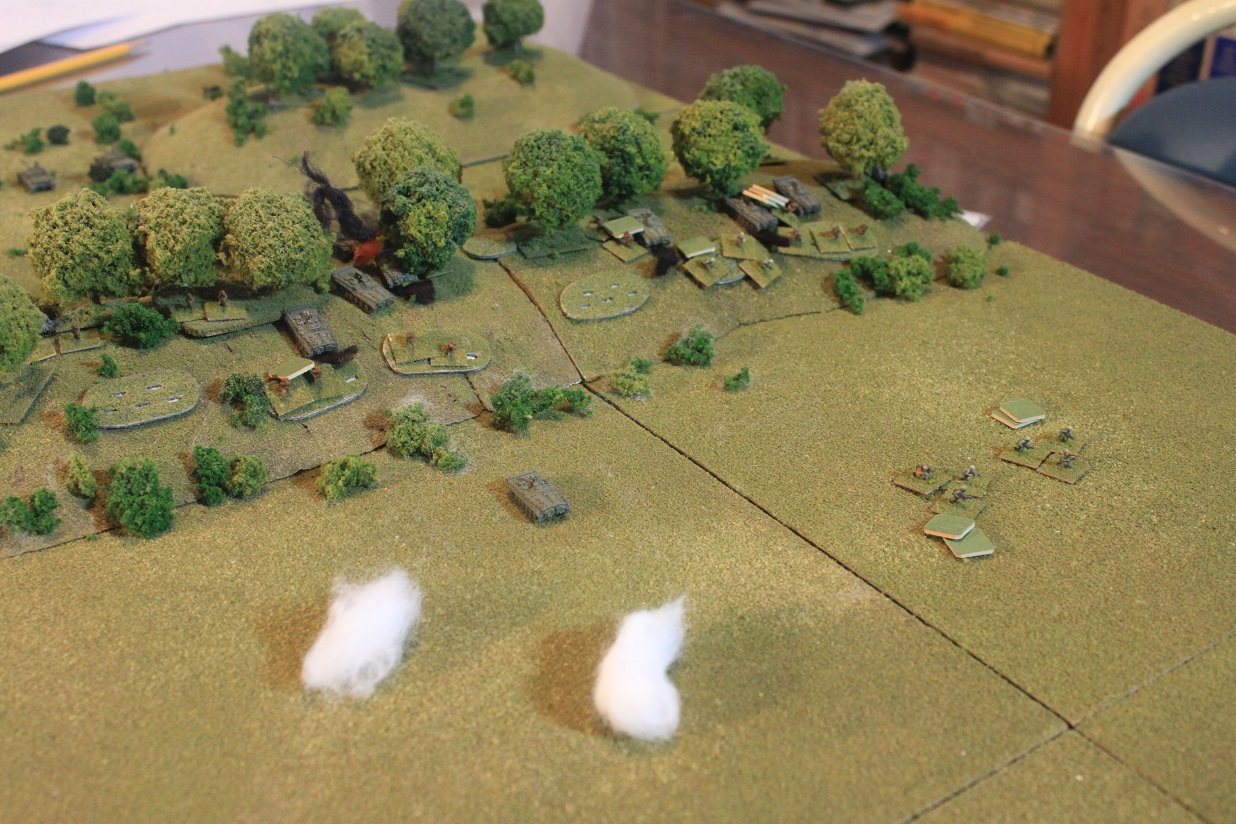
Turn 1: The Soviet barrage begins.
Turn 2 and the barrage continues to pound the Americans. One squad takes a casualty and morale begins to come under pressure – another squad Breaks and another becomes Shaken. Now the Soviets emerge from the trees, moving at speed towards the smoke and dust enshrouded hill. No Dragon gunner is going to expose himself and his weapon to this storm fire. The Soviet artillery has so far successfully suppressed the US ATGMs.

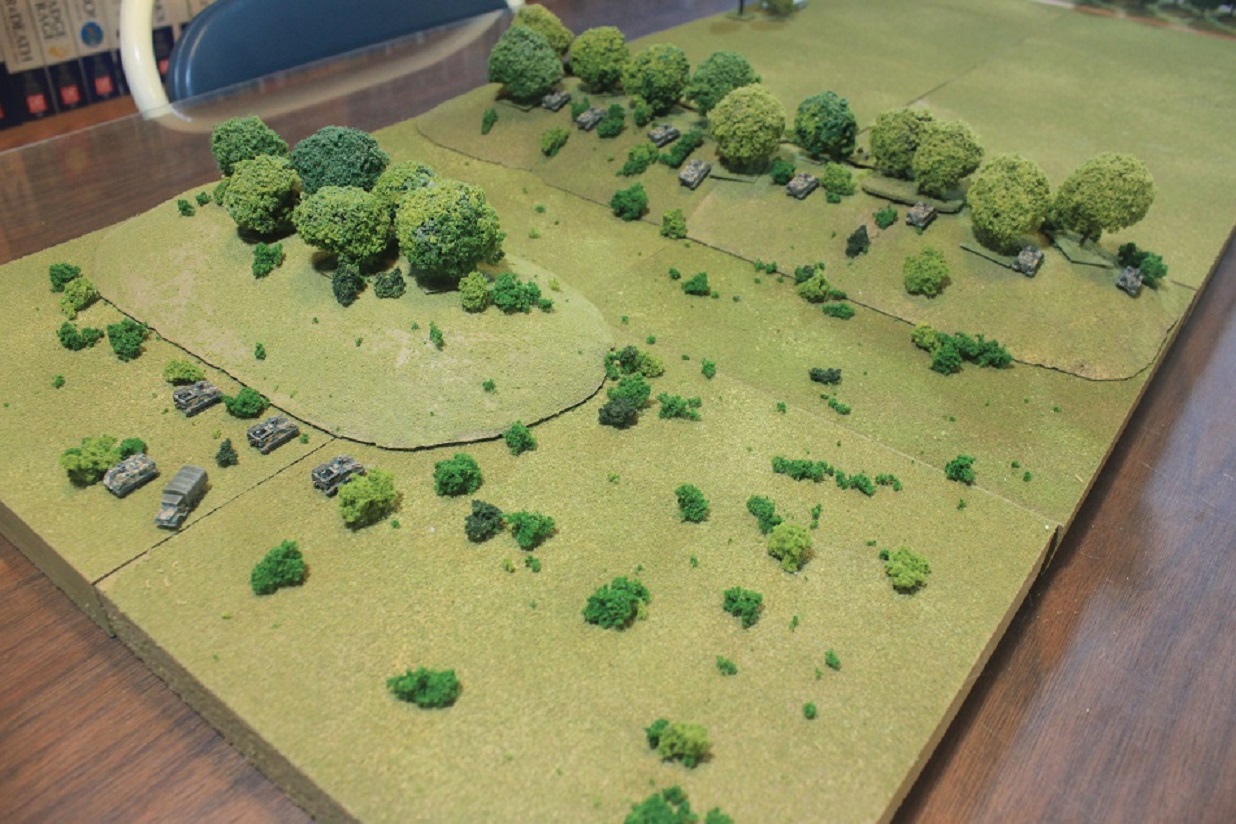
Turn 2: The Soviet advance begins.
Turn 3 and the Americans are still effectively suppressed. Combine suppression with line of sight blocked by smoke and dust from the barrage and the Americans can’t call in their mortar or artillery support. Attempts to recover from the Broken and Shaken morale conditions fail. The Soviet artillery changes to smoke. The Soviet attack continues the advance.

Turn 3: Smoke begins to fall on the objective.
Turn 4 and the Soviets, gaining the initiative, drive through the smoke and into the American position as their barrage is lifted. This puts the Soviets behind the Americans who slowly begin to recover from the shock of the barrage. Their Shaken squad recovers, but US left platoon fails morale recovery and remains Broken.

Turn 4: The barrage lifts and the Soviets drive into the US position.
Turn 5 and the US commander, realizing that the Soviets are on top of him, calls the US artillery onto his own position. Now the Soviets pay, as the 155mm shells take their revenge: one T-62 is knocked out as are three BMPs. The Soviet infantry escapes from their vehicles but are Suppressed. But the artillery does not discriminate and the US takes a hit on one of its squads with two others Suppressed as well. Scattered small arms fire breaks out and a few attempts with LAWs fail. Two of the T-62 tanks break out of the trees on the backside of the US position which causes the US APCs to take flight. The US mortars, seeing the panicked retreat, up stakes as well.

Turn 5: The US calls down artillery onto its own position.
Turn 5: The Sight of Russian tanks sends the US rear into flight.
Turn 6 and the US artillery continues to fall on the US position. Another BMP is killed with its squad escaping the vehicle. A confused fire fight continues on the hill where the US artillery does not fall and begins to go in the Soviets’ favor. The US center platoon, forced to make a morale check, Breaks. With US artillery and Soviet small arms fire coming at them from their rear and flanks, they take heels down the front slope of the US position.

Turn 6: The US position begins to collapse.
Turn 7 and the US company commander, having lost contact with his command, lifts the American artillery fires and assumes an escape and evasion posture. The Soviets destroy the last US squad on the US right and the broken US squads in the center continue their flight. On the US left the remaining US squad keeps up the desperate fight, inflicting casualties on the Soviets pressing in on their fighting positions.
Turn 7: The final agonies.
Turn 8 sees the last US resistance eliminated and the fleeing US squads in the open field chopped down. The US company HQ continues to successful escape and evade. The US vehicle park has fully left the field. The Soviets begin to reorganize and consolidate the objective.

Turn 8: Победа! (Victory!)
US Losses:
2 x TOW tracks
2 x M113s
6 x Infantry squads (100%)
Soviet Losses:
1 x T62
5 x BMPs
2.5 x Infantry squads (39%)
Conclusions
Clearly, artillery was the decisive element in this scenario. It inflicted most of the casualties on both sides and for the Soviets it successfully shut down the US ATGM defense, allowing the Soviets to close with the Americans without loss.
Was this a realistic scenario? Certainly more so than in the previous AAR, The S2’s Demonstration. The reality would be somewhere between the extremes of these two scenarios, though closer to this one rather to its predecessor. Any significant Cold War combat which excludes or severely minimizes Soviet artillery will be, in my considered opinion, understating the reality.
I would like to compliment the Mein Panzer rules for their treatment of the effects of HE (high explosive) artillery on vehicles. Vehicles are at fairly severe risk here, and all but one vehicle were lost to artillery. This tracks with studies that the Soviets carried out and which the US confirmed in its own studies in the 1980s ( Who Says Dumb Artillery Rounds Can't Kill Armor). I have used two other rule sets (TacForce and Dunn-Kempf ) produced in the 1970s which used earlier US data on artillery effects and which produced less damage to armor, thereby encouraging armor drive-throughs of artillery barrages as a viable tactic. Not a good idea in Mein Panzer nor in the real world.
Mein Panzer works well in the Cold War environment and I’m looking forward to the release of the Cold War rules and data for this period.
Questions
Q: Why didn't the US Mortars fire?
Reason 1: No line of sight for the mortar observer. Smoke, dust and explosions under a barrage encourage you to keep your head down.
Reason 2: The guys with the mortars would hear the Soviet barrage, but wouldn't know what was happening. Do they, in the absence of orders (remember the FO is trying to keep his head safe) fire a barrage on their own initiative? On the game table, one sees a lot. If you are on the ground you don't see so much, so ignorance of the situation breeds doubt and indecision. And you don't have unlimited ammo. Do you fire it up at what may be phantoms of the imagination? Explain that to the CO when it's time for the real mission and you've fired up your stock. So indecision and lack of command direction kept the mortars from firing.
Q: Why didn't the US use counter-battery fire?
I gave the Soviets their preferred scenario conditions. It was their demo after all.
Notes
[1] Baxter, William, “Soviet AirLand Battle Tactics”, Presidio Press, 1986, pg. 184
Well done scenario!!
ReplyDeleteThanks. Glad you found it interesting.
Delete