AAR – TacForce – The 1000 Meter Dash
This game was done in 2020 using GHQ vehicles and figures.
I’ve gotten enough Cold War vehicles and figures now to do some Cold War gaming. This is an AAR using the TacForce rule set which was published in 1980 by Game Designers Workshop in collaboration with GHQ. I’ve had my copy since 1980, but never played the game till now. Better late than never. This was a solo undertaking to see how this game worked.
Ground scale is 1 inch = 50 meters. One turn equals 1 minute. One model equals one vehicle. Infantry is fire team units for US and squads for the Soviets. Soviets move first then US. Two fire phases in a turn – both sides can fire in a fire phase. Fire is governed by fire priority – better troops fire first. All weapons and vehicles have data cards which are used to assess hits and kills. This feature can be a bit tedious if there is a lot of different equipment involved. Of course, being published in 1980 means the weapons and vehicles are late ‘70s, (no Abrams) so it may not have universal appeal.
So, here goes…
Situation
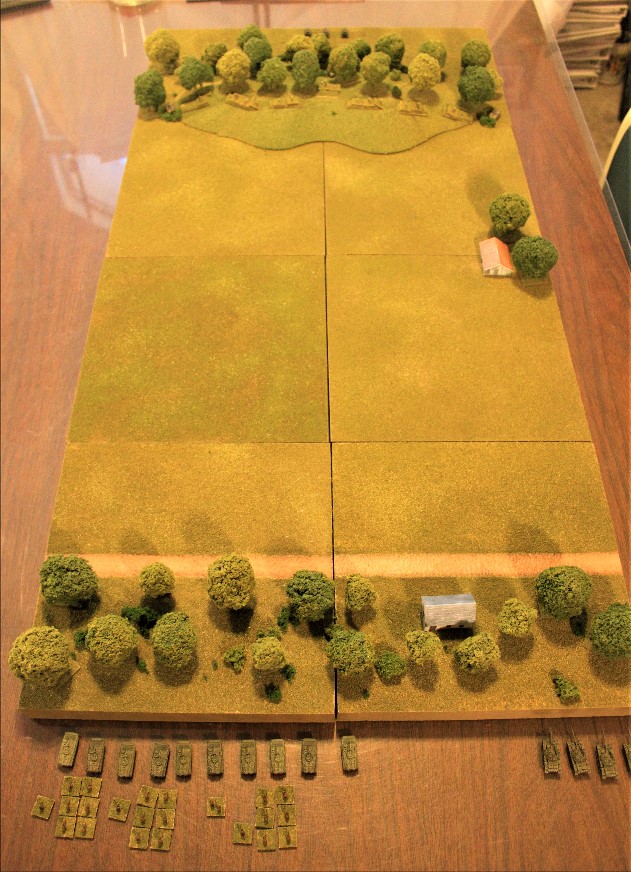
A reduced US mechanized infantry company is defending a hill. A Soviet motor rifle company with a tank platoon wants to take the hill from the Americans.
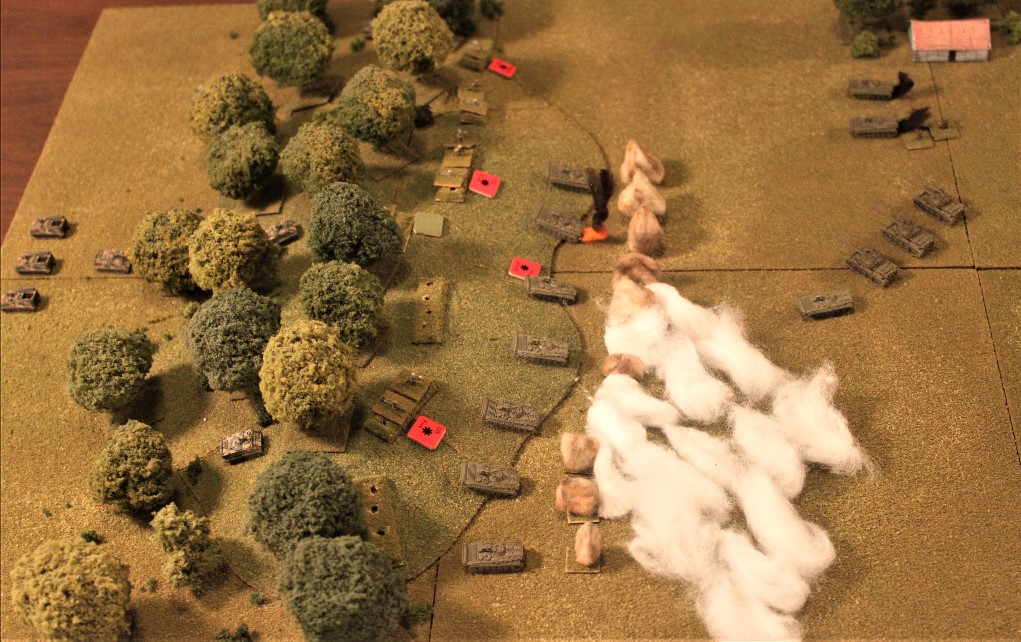
The hill is at the top of the picture. The Soviets will come out of the woods at the bottom. They will have 1 kilometer of open ground to cross.
Forces
The US has four infantry squads (eight fire teams) with LAWs; two Dragons; two M150 TOW tracks; the company mortars (3 x 81mm); and six M113s. A 155 mm battery is available.
The Soviets have a motor rifle company with ten BMPs, nine motor rifle squads, four T-62s, and a 122mm battery in support.
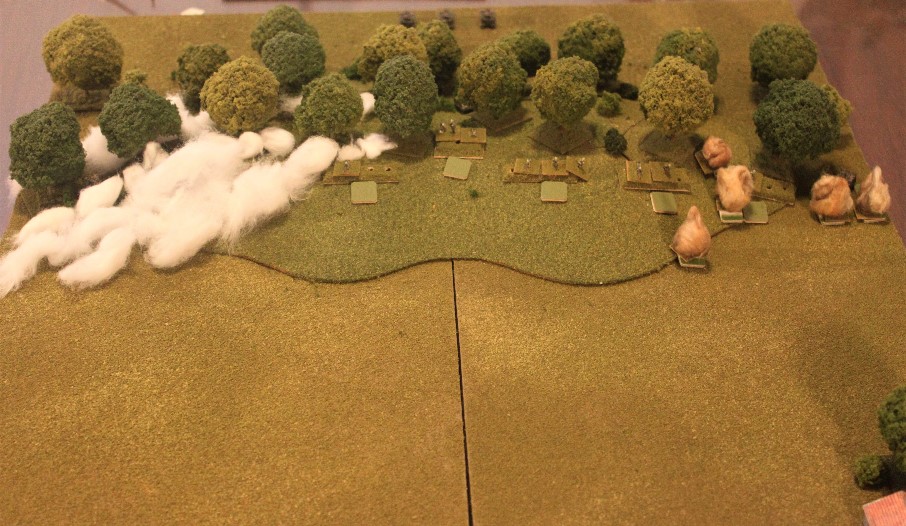
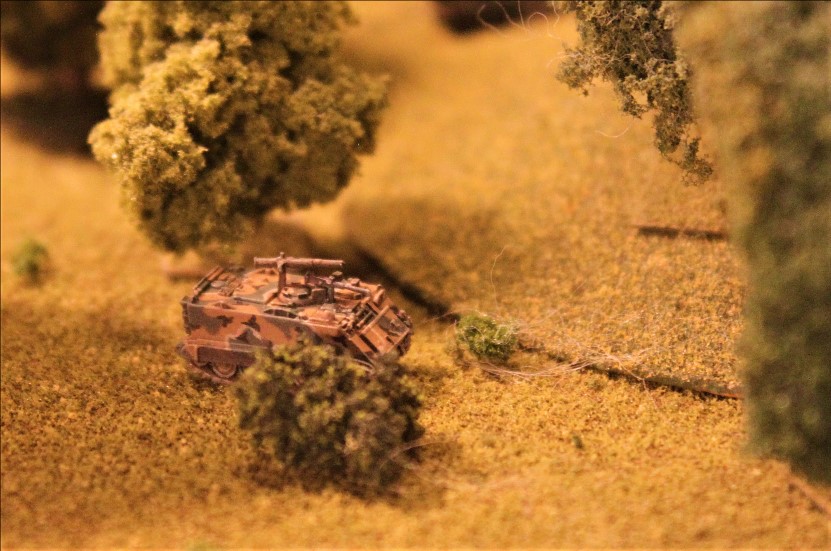
A view of the US position, with the Threat (as it was referred to) coming from the left.
The US TOWs and Dragons have been placed on the flanks to maximize the opportunity for flanking shots, one TOW and Dragon on each flank. The infantry and Dragons are dug in. All US forces are unspotted.
The Soviet problem is to cross a kilometer of open terrain in the face of the US ATGM defenses. These missiles have a 90% to-hit and a 90% to-kill probability. It will take the Soviets four turns to cross the open terrain. That is enough time for the ATGMs to kill every Soviet tank and BMP as they approach.
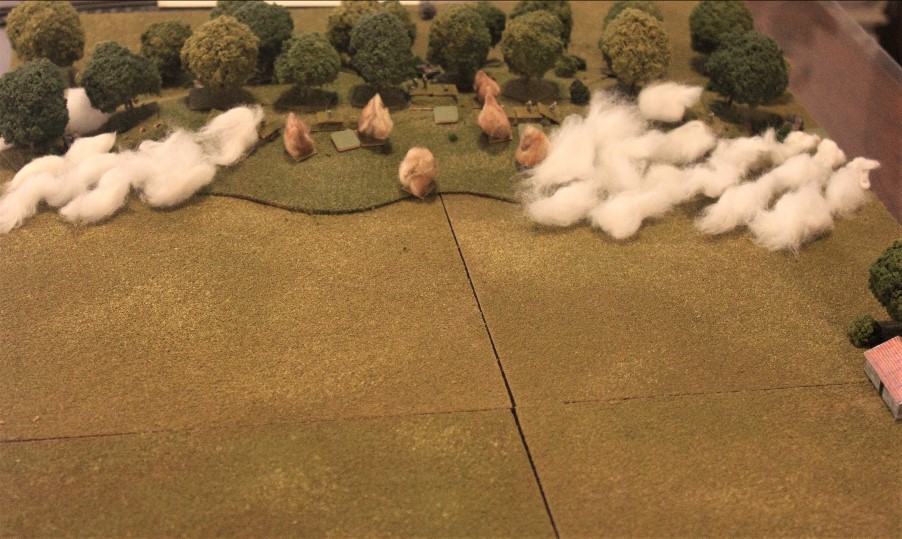
The Soviets will depend on their artillery, speed, and some careful timing to see them across this killing field. HE to suppress and smoke to blind the ATGM defenses.
The Game
The Soviets begin by directing their artillery on the right of the US position, firing HE and smoke. This barrage will be short but intense.
This barrage is very effective: it kills the right flank Dragon gunner and two US fire teams. The artillery shifts to the US left, with another short but intense barrage of HE and smoke. No losses to the US from this barrage.
Then the Soviet artillery shifts to the center, with HE and smoke. Again, the HE produces no results.
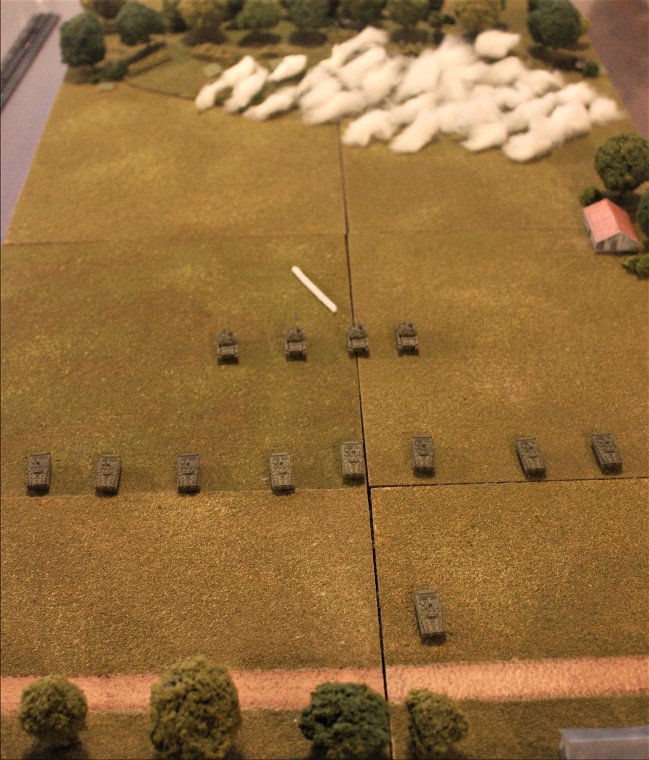
Now the Soviet tanks and BMPs come into the open. They need to cross the open ground before the smoke dissipates. It is already thinning on the US right.
As the smoke clears the M150 fires (white pipe cleaner is an ATGM in-flight indicator) and gets a kill on a T-62.
The M150 fires a second time but the tanks spot the M150 (but not the incoming missile) and fire, getting a suppression on the M150. This causes loss of control of the missile (a problem with the M150 was the TOW gunner had to expose his person to operate the weapon).
The tanks stop so as to support the attack from outside of LAW range and the BMPs move ahead. As the Soviets close the US calls for Final Protective Fires (FPF) from his mortars and the 155mm artillery. Suppressive fire on the right flank TOW encourages it to back into the woods. The smoke clears enough on the US left that the TOW and Dragon get shots off against two BMPs. Each missile scores a kill. Only one Soviet squad is able to bail out. The other dies in its vehicle.
The M150 exercising the better part of valor.
The dead BMPs and the lucky squad and platoon leader.
The BMPs elect to drive through the US artillery, rather than dismount in front of the US FPF. One BMP becomes suppressed by the artillery, but all vehicles pass through. Now the remaining US infantry, reduced on their right but unscathed on their left, launch a barrage of LAWs at the BMPs as they emerge from the smoke and dust. Two BMPs are killed with their passengers KIA. One BMP kill is catastrophic and burns. The BMPs reply and gain suppressions on two US fire teams and a kill on a third (suppressed is noted by the red counters on the table). The Soviet tanks move to keep the now spotted TOW and Dragon on the US left suppressed. Under this fire the Dragon is taken out and the M150 TOW pulls back.
The Soviet infantry dismounts and begins its assault. The last infantry on the US right is eliminated.
At this point the US commander decides the best thing is to withdraw. The Soviets have gained the hill. All US forces escaped except for one fire team and one platoon leader who remained suppressed on their position as the Soviets swept the hill.
Losses
US lost:
2 Dragon gunners
5 fire teams
1 platoon leader
1 platoon leader POW
1 fire team POW
Soviets lost:
1 T-62
4 BMPs
3 squads
Evaluation
First time with the game, I'm sure mistakes and oversights were made and there were inefficiencies in the use of forces, but I felt the game worked fairly well. The data cards can be a bit of a hassle. Big actions, i.e. games with battalion sized forces, may be a big investment of time. Not a problem. I will be using these rules again.
Next study, same situation, will be with the Dunn and Kempf rules (recently acquired), which I’ve heard of, but never played.


Comments
Post a Comment